I am not at home this week--off to enjoy the company of my brother and sister in Tennessee and Kentucky. Knowing I wouldn't be here to do the next challenge, I tried to come up with an easy Halloween idea. I decided to show several crafts I have done in the past.
And then for your enjoyment, I am sharing a delicious pumpkin recipe in keeping with the season.
Crock-pot Pumpkin Bread Pudding
16 slices of day old French bread, cubed This should fill your crock-pot
2 cups milk
4 eggs
Beat together the milk and eggs
Stir in the following ingredients.
1/4 cup sugar
1/4 cup butter, melted
1 can pumpkin pie filling--not just plain pumpkin
1/4tsp. cinnamon
1/4 tsp. ground nutmeg
Can also add 1/4 cup raisins iif desired
Mix thoroughly so no streaks show
Pour over bread and stir. Cover and cook on high 1 hour.
Reduce heat to low, cook 3 to 4 hours or until temperature is 160 degrees.
Turn off heat and keep warm until served.
Serve with vanilla sauce.
Vanilla Sauce
2 Tbls. butter, melted
2 Tbls. flour
1 cup water
3/4 cup sugar
1 tsp. vanilla
Make sauce just before pudding is done. Melt butter in saucepan. Stir in flour until smooth. Gradually add water, sugar and vanilla. Bring to a boil. Cook, stirring constantly, until thickened. Pour sauce over hot bread pudding.
Yummy!
Wednesday, October 12, 2011
Wednesday, October 5, 2011
Iron Craft Challenge #40 Bottle and Jar
After a few weeks off because of elbow surgery, I am now back to the weekly craft challenges.This week's Bottle and Jar Challenge fit right in with the cover project on the October Woman's Day magazine.
The materials needed were jars, orange tissue, Mod Podge, black paper, sponge brushes, and battery operated votive lights. The tissue was cut into strips and mod podged to the outside of the jars and black faces added.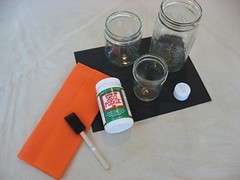
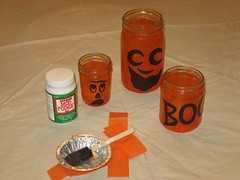
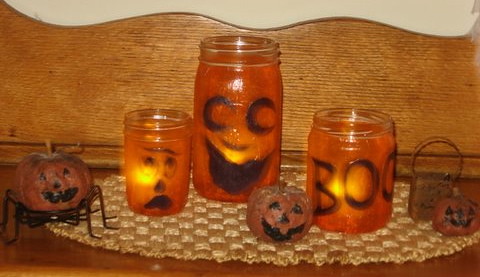
I think they turned out great and help to welcome Halloween in my front entry hall.
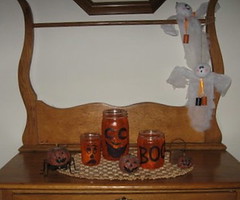
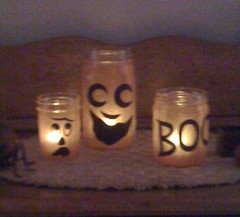
The materials needed were jars, orange tissue, Mod Podge, black paper, sponge brushes, and battery operated votive lights. The tissue was cut into strips and mod podged to the outside of the jars and black faces added.


I think they turned out great and help to welcome Halloween in my front entry hall.


Wednesday, September 14, 2011
Challenge # 37- Shrink to Fit
One of the most cherished items in my kitchen is an old printer's file case, which we turned into a memorabilia box full of miniatures that represent favorite things or events in my/our life--cooking, sewing, golfing, cats, the Seminole football team, teaching, the USA, Minnesota, Door County, and trips to Maine and the West.
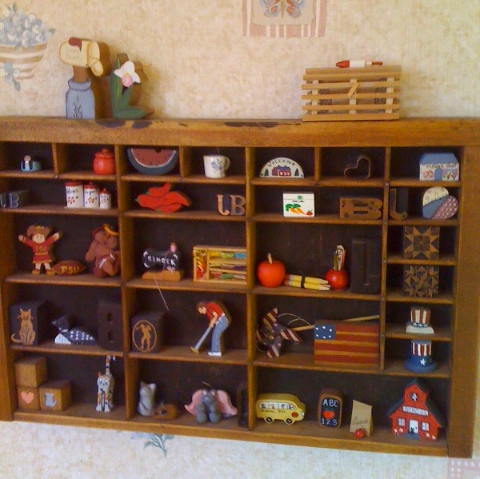
I also have a small shelf in my entry hall which I decorate with seasonal miniatures picked up over the years. So for this challenge, I decided to do a little ghost tree using, what else, but more of the sculpty clay--I had to buy a whole set for Challenge 31. I made 5 little ghosts, the letters BOO!, and planted a tree in a small pot.
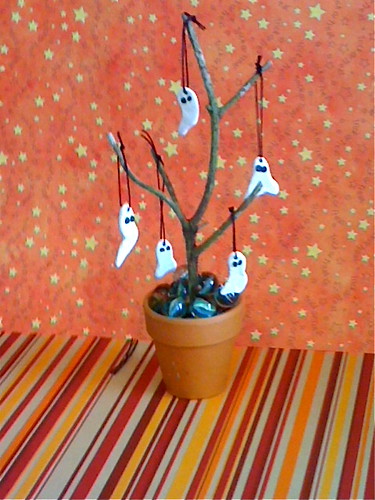
Now I have a new addition to my Halloween shelf.
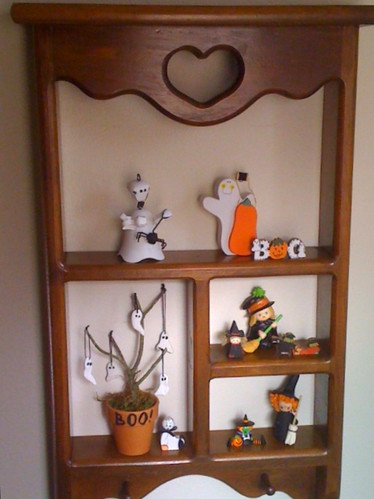

I also have a small shelf in my entry hall which I decorate with seasonal miniatures picked up over the years. So for this challenge, I decided to do a little ghost tree using, what else, but more of the sculpty clay--I had to buy a whole set for Challenge 31. I made 5 little ghosts, the letters BOO!, and planted a tree in a small pot.

Now I have a new addition to my Halloween shelf.

Wednesday, August 31, 2011
Challenge #35 Done Reading
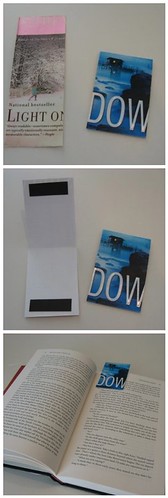
Books have always been an inportant part of my life--from Mother Goose to my Kindle. Along the way are many enjoyable hours of reading. For this challenge, my first thought was bookmarks.
Several years ago, I had made some magnetic bookmarks for members of my bookclub, and I thought perhaps I could reinvent them. Having a bunch of paperbacks around the house, I thought why not use their covers for the bookmarks.
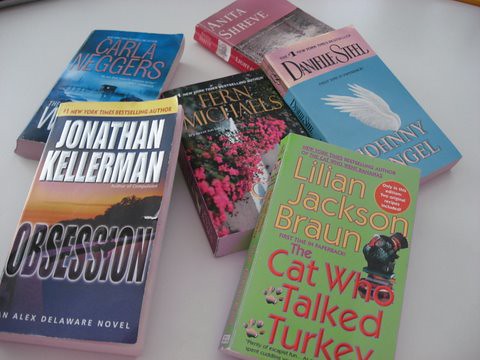
I cut a 2x6 inch strip from the cover, folded it in half, added magnetic strips to the ends, and had a bookmark to fold over a page.
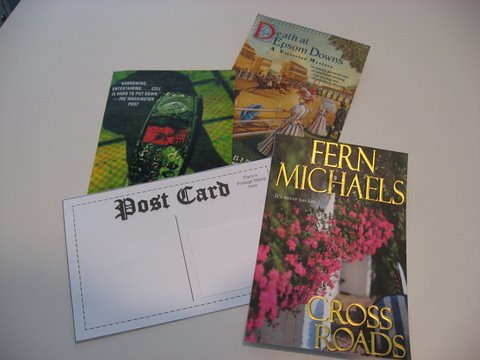
Since I had several paperbacks left, I decided to go back to an old challenge--postcards. I had several postcard backs left from that challenge, so I glued them to a paperback cover and now have some new postcards to send.
Now that I have finished this challenge, I can get back to my latest read--Vermilion Drift by William Kent Krueger, a favorite Minnesota author. Some other good book suggestions, if you're into reading:
The Heretics Daughter by Kathleen Lent
House on the Corner of Bitter and Sweet by Jamie Ford
Little Bee by Chris Cleave
Several years ago, I had made some magnetic bookmarks for members of my bookclub, and I thought perhaps I could reinvent them. Having a bunch of paperbacks around the house, I thought why not use their covers for the bookmarks.

I cut a 2x6 inch strip from the cover, folded it in half, added magnetic strips to the ends, and had a bookmark to fold over a page.
Since I had several paperbacks left, I decided to go back to an old challenge--postcards. I had several postcard backs left from that challenge, so I glued them to a paperback cover and now have some new postcards to send.

Now that I have finished this challenge, I can get back to my latest read--Vermilion Drift by William Kent Krueger, a favorite Minnesota author. Some other good book suggestions, if you're into reading:
The Heretics Daughter by Kathleen Lent
House on the Corner of Bitter and Sweet by Jamie Ford
Little Bee by Chris Cleave
Wednesday, August 24, 2011
Iron Craft #34- On the Go
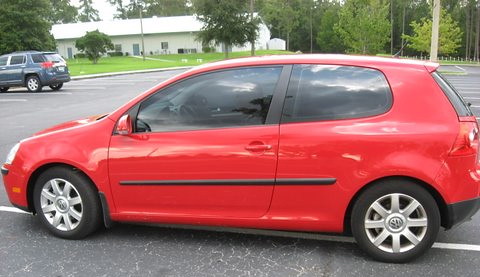
Since my mode of transportation is a Volkswagon Rabbit, I wanted to do something that involved this vehicle.
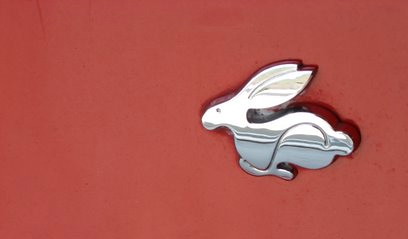
I decided to do a key ring out of Sculptey, since I had some left over from an earlier challenge. First, I did a pencil rubbing of the rabbit logo that was on the back of the car.
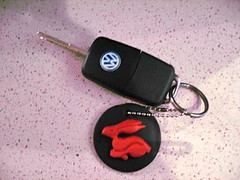
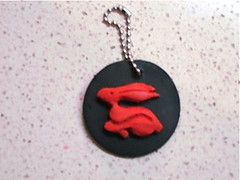
Then I used that pattern to cut and sculpt a rabbit out of red clay which I affixed to a black clay circle. Baked it in the oven, added a chain and loop, and my VW Rabbit now has a logo key ring!

I decided to do a key ring out of Sculptey, since I had some left over from an earlier challenge. First, I did a pencil rubbing of the rabbit logo that was on the back of the car.

Then I used that pattern to cut and sculpt a rabbit out of red clay which I affixed to a black clay circle. Baked it in the oven, added a chain and loop, and my VW Rabbit now has a logo key ring!


Wednesday, August 17, 2011
Iron Craft #33- UFOs
UFO's--I have too many to count, and not enough interest at this time to finish them--too many new things to try!
HOWEVER--I believe I probably have the oldest UFO of all the Iron Crafters!
I inherited a quilt top that my mother had begun in the 1940's. She never finished it and I acquired it in the 1980's. At that time you couldn't find vintage-looking fabrics and the top needed a backing, a border, and a little perking up. After much searching, I settled on several fabrics that I could use. I added lace between the blocks and appliqued centers to each of the blocks and used that fabric for the border. I also found a neutral fabric for the backing, added batting, and began to HAND QUILT!
It was more of a project than I anticipated--my life being full with family, teaching, and a lot of other craft interests. So the quilt sat in a drawer for many years. After I retired, it moved with me to our present home. Every time I open my craft drawer it callls to me! So, at least once a year, I say "this is the year"--take it out and do a couple of blocks. At this rate, I might finish it in my lifetime, but my daughter, the Mom of "A Mom and 2 Things , or my niece, Kat, being the granddaughters of my mother may end up inheriting a UFO!
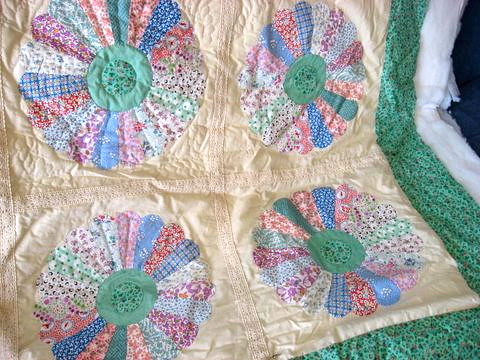
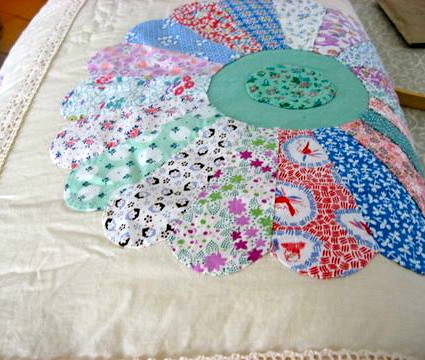
PS Now that I have the quilt out again--maybe I"ll do one block--or
maybe two--never know, this might be the year!!
HOWEVER--I believe I probably have the oldest UFO of all the Iron Crafters!
I inherited a quilt top that my mother had begun in the 1940's. She never finished it and I acquired it in the 1980's. At that time you couldn't find vintage-looking fabrics and the top needed a backing, a border, and a little perking up. After much searching, I settled on several fabrics that I could use. I added lace between the blocks and appliqued centers to each of the blocks and used that fabric for the border. I also found a neutral fabric for the backing, added batting, and began to HAND QUILT!
It was more of a project than I anticipated--my life being full with family, teaching, and a lot of other craft interests. So the quilt sat in a drawer for many years. After I retired, it moved with me to our present home. Every time I open my craft drawer it callls to me! So, at least once a year, I say "this is the year"--take it out and do a couple of blocks. At this rate, I might finish it in my lifetime, but my daughter, the Mom of "A Mom and 2 Things , or my niece, Kat, being the granddaughters of my mother may end up inheriting a UFO!


PS Now that I have the quilt out again--maybe I"ll do one block--or
maybe two--never know, this might be the year!!
Wednesday, August 10, 2011
Iron Craft Challenge #32- Summer!
The lazy days of summer are upon us and also Challenge 32--the
Summer Contest. I am too lazy to think of a "brilliant idea", so am
taking the easy way out. I loaded a tray with a couple of cool drinks,
added some paper butterflies to the straws, picked a few hibiscus
leaves to cover several votive lights and to use as coasters, and
finished with a little bowl of nibbles.
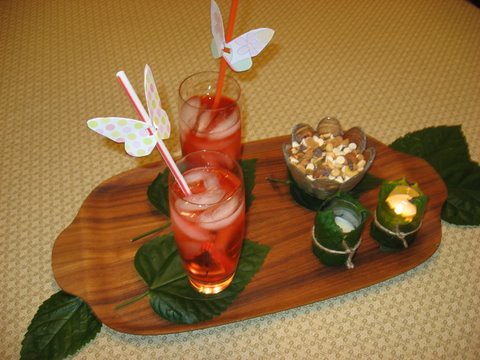
A cool end to a hot afternoon! Challenge complete!
Summer Contest. I am too lazy to think of a "brilliant idea", so am
taking the easy way out. I loaded a tray with a couple of cool drinks,
added some paper butterflies to the straws, picked a few hibiscus
leaves to cover several votive lights and to use as coasters, and
finished with a little bowl of nibbles.

A cool end to a hot afternoon! Challenge complete!
Wednesday, August 3, 2011
Iron Craft #31 Sculptural
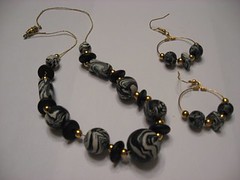
After dabbling in crafts for 50 years, many of the things I have done in the past fit the Iron Craft Weekly Challenges. So as I mentioned before, some weeks I will show some of the old along with the new. I experimented with Filo clay quite a few years ago and the necklace and earrings are a result of that effort.
I did nothing further with sculpting until this week's challenge.
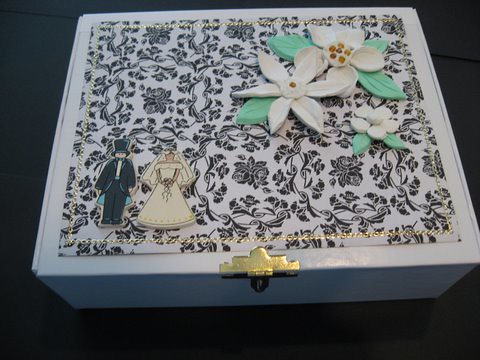
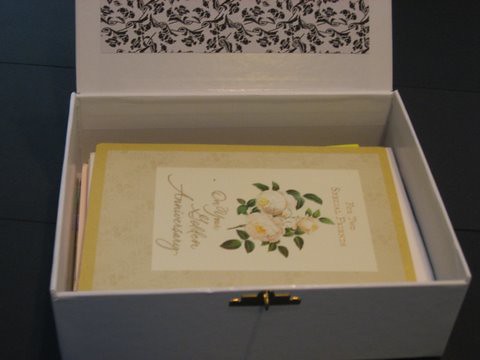
When we were "Up North" on vacation, we celebrated our 50th wedding anniversary. As we received many lovely cards, I wanted to find a box to keep them in, instead of an album.
So this week's challenge provided that opportunity. I found the perfect box at Michael's along with a sheet of neat looking scrapbooking paper. I also bought some Sculpey clay and sculpted some flowers and leaves.
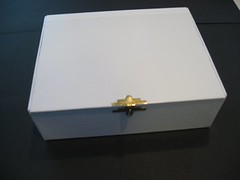
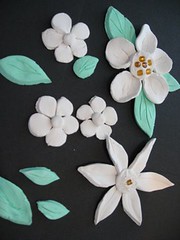
I added the paper, flowers, and a wooden bride and groom I found in my craft stash to the box and now I have the perfect card box!
Wednesday, July 27, 2011
Iron Craft #30 HOT!
It's HOT!
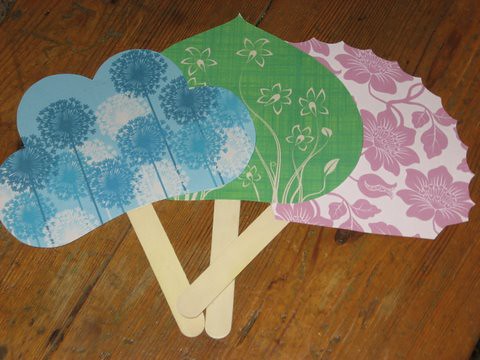
As I am writing this, it is 93 degrees with a heat index of 100. So when I think hot, I think of ways to keep cool.I think the perfect idea for keeping cool is the Cool Scarf I did for Challenge #24 which you can see here. So for something new, my next thought was fans. I found several on homemadesimple.com. Not too practical for me, but would make cute favors for an outside summer wedding.
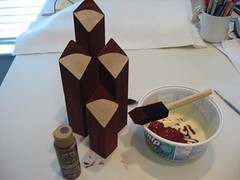
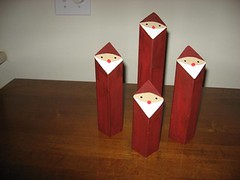
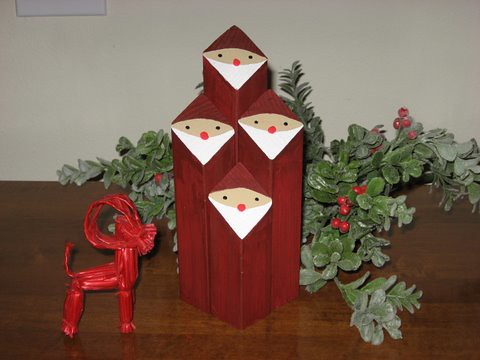
Finally, I thought why not "Christmas in July"--think cool December and cool, Christmasy thoughts. We had seen some "tomtes" in a Scandinavian shop and Grandpa thought he could cut them for me and I knew that I could paint them.
After painting, I think they turned out well and will be great for my "Swedish Christmas" in those cool days of December.
Remember if you're HOT, think Cool!
Wednesday, July 20, 2011
Iron Craft #29 - Buttons
BUTTONS, BUTTONS, BUTTONS!!!
Just got back from a great vacation and it's time to get crafting again. I have used buttons for many years in numerous craft projects, in fact, I am showing a few from days gone by--one is on the wall in my craft room and the other is on my craft room door.
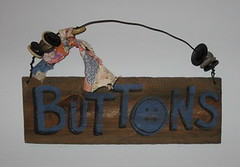
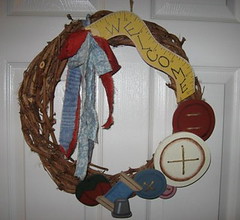
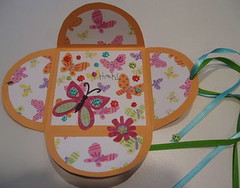
Just got back from a great vacation and it's time to get crafting again. I have used buttons for many years in numerous craft projects, in fact, I am showing a few from days gone by--one is on the wall in my craft room and the other is on my craft room door.


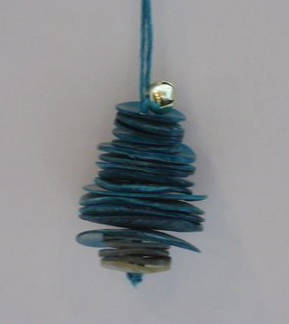
For this week, I found some pretty buttons in graduated sizes and made a Christmas tree ornament or gift ti-on. I topped the tree with a tiny gold jingle bell. The original idea came from Martha Stewart via Modern Minerals.
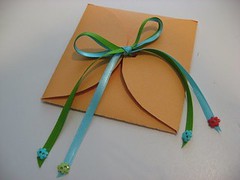
The second craft I did was a card. I love to make cards as they are great for someone who wants to down-size, as they are given and gone. For this card, I used card stock and scrap book paper which I accented with some tiny buttons I had on hand. Easy and useful!


Until next week.....
Wednesday, July 6, 2011
Iron Craft #27- Stars and Stripes
Since the girls gave me no choice and set me up with a blog, you will at times, have to bear with the thoughts and memories of days gone by, as well as the craft challenge of the week. This is one of those times! Fourth of July today will always be compared to those Fourths of my childhood.
Our family would visit my Dad's mother for the holiday. As a ten to twelve year old, it was a much anticipated holiday. I was free to go with my girlfriends early in the morning to see them set up the booths along Main Street in anticipation of the BIG PARADE! It was a good miles walk, but we were eager to go. After watching all the pre-parade preparations, we would meet my parents to watch the parade. Afterwards, we would walk and mingle with the crowds the length of Main Street. My Dad was a hometown football hero who played at the "University" and I was so proud when he was hailed by everyone! After the parade, the whole family drove about 5 miles to the "lake" where a picnic, swimming, and games took place. Then it was back to town for a band concert and fireworks at the football stadium--a perfect end to a perfect day! What more could a child want!
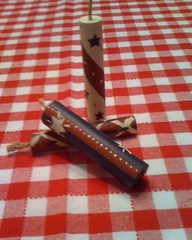
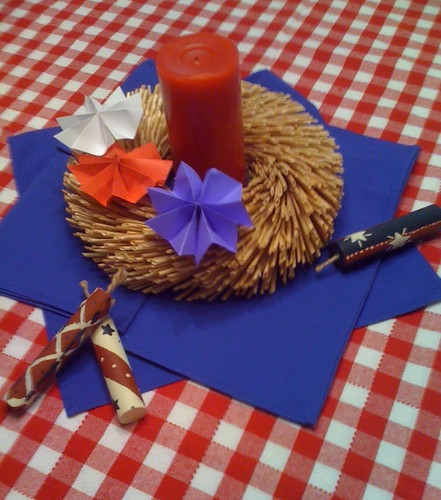
Now, enough rambling, and on to the challenge of the week. As we were having a small potluck with friends, I needed a quick and easy centerpiece for the table. Martha Stewart's website had some directions for some easy paper stars which I made and added to a straw wreath from IKEA. I used some blue napkins to form a star shape and put a candle in the middle. I also used some "firecrackers" I made several years ago. They are dowel rods, cut and painted. Grandpa bored a hole in each one and I glued a piece of jute twine in the ends for fuses The holiday was good, but can't compare to days of yore!.

Wednesday, June 29, 2011
Iron Craft #26-Camp Craft
Who would have thought back in January that I would be doing almost every week of the Iron Craft and then in June that I would have my own blog. Surely not me.
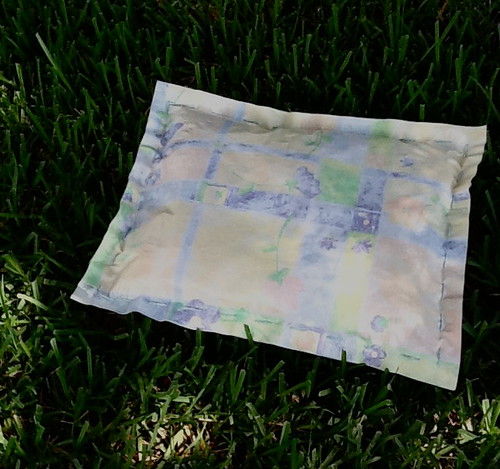
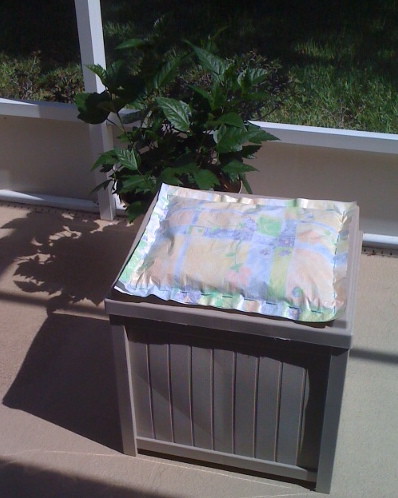
Once upon a time (in the late 40's, I believe) when I went to Brownie or Girl Scout Camp, one of the first things we did was make a "sit-upon". This was a stack of used newspapers, covered in "oil" cloth and laced around with an overcast stitch. It was then used to sit upon around the campfire on sand or possibly wet grass. It was very heavy, but effective. So as my camp craft, I decided to make a modern day "green" sit-upon. I used an old vinyl tablecloth, cut two large rectangles, stitched around with a running stitchn to make an envelope which I stuffed with plastic bags and closed off the top. Viola--a sit-upon which I can use for those damp park or picnic benches!
Once upon a time (in the late 40's, I believe) when I went to Brownie or Girl Scout Camp, one of the first things we did was make a "sit-upon". This was a stack of used newspapers, covered in "oil" cloth and laced around with an overcast stitch. It was then used to sit upon around the campfire on sand or possibly wet grass. It was very heavy, but effective. So as my camp craft, I decided to make a modern day "green" sit-upon. I used an old vinyl tablecloth, cut two large rectangles, stitched around with a running stitchn to make an envelope which I stuffed with plastic bags and closed off the top. Viola--a sit-upon which I can use for those damp park or picnic benches!
Subscribe to:
Comments (Atom)


